Contact Info:
+88 01601135050
hey@shahinalam.com
Contact Info:
+88 01601135050
hey@shahinalam.com

Master your WordPress site’s SEO with our guide on adding and editing a robots.txt file. From using plugins like Yoast to tweaking files via FTP, we break down every step to control search engine crawlers.
Hey there, SEO warriors! If you’re diving into SEO, you’ve probably heard about the robots.txt file. It’s like the bouncer at the club, telling search engine crawlers which pages they can party on and which ones are off-limits.
Getting it right can boost your site’s crawlability and rankings, but mess it up, and you might accidentally block Google from your best content. Yikes!
As an SEO expert, I’m here to walk you through how to add and edit a robots.txt file in WordPress like a breeze. Whether you’re a newbie or a seasoned site owner, this pillar article has you covered with practical steps, tips, and tools. Let’s get started!
Before we jump into the how-to, let’s break it down. A robots.txt file is a simple text file that lives in your website’s root directory. It gives instructions to search engine bots (like Googlebot) about which pages or sections of your site they should crawl or skip.
Why is this a big deal for SEO? Well:
But here’s the kicker: robots.txt isn’t a security tool. If you want to keep something truly private, use password protection or a noindex tag. Robots.txt is more like a polite suggestion that well-behaved bots (like Google) follow.
WordPress is pretty cool because it automatically generates a virtual robots.txt file for every site. You won’t see a physical file in your server, but it exists and does its job.
To check it out:
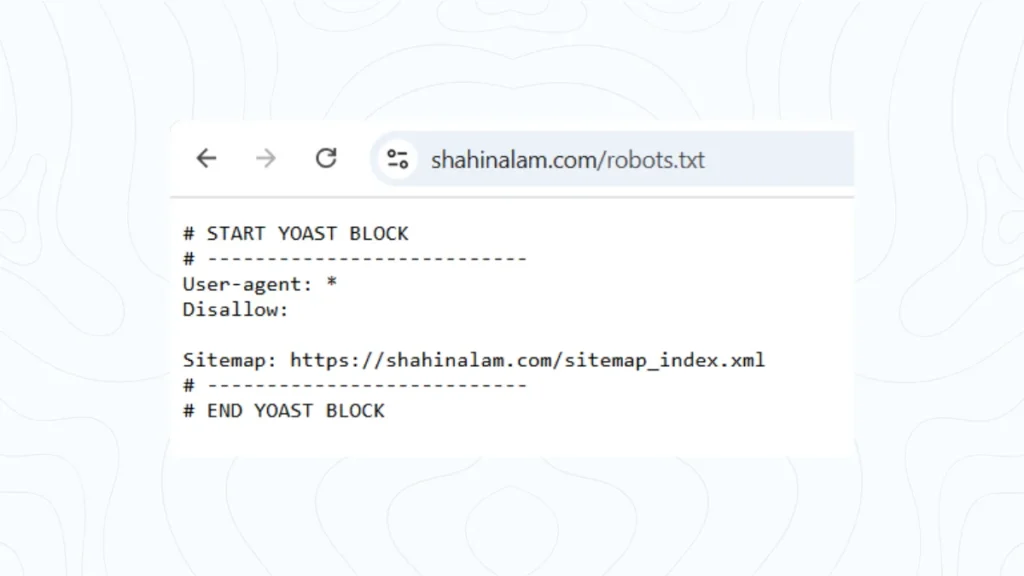
User-agent: *
Disallow: /wp-admin/
Allow: /wp-admin/admin-ajax.php
This is WordPress’s default setup. It tells all bots (User-agent: *) to stay away from the admin area (Disallow: /wp-admin/) but allows access to the admin-ajax.php file for functionality.
If you see this, congrats—you’ve got a robots.txt file! If not, don’t worry; we’ll create one in the next steps.
Pro Tip: If you’re using a caching plugin or CDN, clear your cache before checking. Sometimes, cached versions can hide the real robots.txt.
Before editing or creating a robots.txt file, you need a game plan. Ask yourself:
Which pages or directories do I want to block? Examples: login pages, staging sites, or duplicate content like tag archives.
Which pages do I want to prioritize? Allow bots to focus on your money-making pages (like product pages or blog posts).
Do I need crawler-specific rules? For instance, you might want to block low-value bots like AhrefsBot while allowing Googlebot.
Here’s a sample robots.txt setup for a WordPress site:
User-agent: *
Disallow: /wp-admin/
Disallow: /wp-login.php
Disallow: /category/*/
Disallow: /tag/*/
Allow: /wp-admin/admin-ajax.php
Sitemap: https://yourdomain.com/sitemap.xml
This setup:
SEO Expert Note: Don’t blindly copy this. Every site is unique. For e-commerce sites, you might want to allow category pages if they’re optimized. Test your robots.txt rules with Google Search Console’s robots.txt Tester to avoid costly mistakes.
Now, let’s get to the fun part—actually adding or editing your robots.txt file. You’ve got three solid options, depending on your comfort level and tools. Pick the one that vibes with you.
If you’re already using an SEO plugin like Yoast SEO or Rank Math, you’re in luck. These plugins let you edit your robots.txt file without touching code or server files. Here’s how:
Yoast SEO
Rank Math
Why I Love This Method: It’s beginner-friendly, and you don’t need to mess with FTP or code. Plus, these plugins often warn you if your syntax is off.
Heads-Up: If your site has a physical robots.txt file (not virtual), some plugins might not let you edit it directly. You’ll need Method 2 or 3.
If you’re comfy with server access, you can create or edit a physical robots.txt file using FTP/SFTP. This gives you full control.
Here’s the step-by-step:
Pro Tip: Always back up the original file before editing. One wrong line can block your entire site from Google. Been there, fixed that!
For the code-savvy folks, you can manage robots.txt programmatically. This is great if you want dynamic rules or don’t want a physical file.
Plugins like Virtual Robots.txt let you create and manage a virtual robots.txt file from your dashboard. Install, activate, and edit away.
You can hook into WordPress’s virtual robots.txt using a code snippet. Add this to your theme’s functions.php file or a custom plugin:
add_filter('robots_txt', 'custom_robots_txt', 10, 2);
function custom_robots_txt($output, $public) {
    $output .= "User-agent: *\n";
    $output .= "Disallow: /wp-admin/\n";
    $output .= "Disallow: /wp-login.php\n";
    $output .= "Allow: /wp-admin/admin-ajax.php\n";
    $output .= "Sitemap: https://yourdomain.com/sitemap.xml\n";
    return $output;
}
Why This Rocks: You can add conditional logic (e.g., block bots only on staging sites). Just be careful—test your code in a staging environment first.
Once you’ve added or edited your robots.txt, don’t just cross your fingers and hope for the best. Test it to make sure it’s working as intended.
Here’s how:
SEO Expert Tip: Use tools like Screaming Frog or Sitebulb to simulate how bots crawl your site with the new robots.txt rules. This can catch sneaky issues before they hurt your rankings.
I’ve seen even seasoned SEOs trip up on robots.txt. Here are some pitfalls to dodge:
Blocking CSS/JS Files: Disallowing /wp-content/ can prevent Google from rendering your site properly. Be specific with your rules.
Overusing Disallow: Blocking too much (like your entire site with Disallow: /) is a ranking disaster. Double-check your syntax.
Forgetting the Sitemap: Always include your XML sitemap URL to help bots find your content.
Ignoring Case Sensitivity: Robots.txt is case-sensitive. Disallow: /Page/ isn’t the same as Disallow: /page/.
Not Testing Changes: Always test after editing. A tiny typo can cause big problems.
Want to take your robots.txt to the next level? Here are some advanced tips:
Block Low-Value Bots: Some bots (like SemrushBot or AhrefsBot) eat up server resources. Example:
User-agent: AhrefsBot
Disallow: /
Allow Image Crawling: If images drive traffic (e.g., for e-commerce), ensure Googlebot-Image can access them:
User-agent: Googlebot-Image
Allow: /wp-content/uploads/
Dynamic Rules for Large Sites: For sites with thousands of pages, use wildcards () or regular expressions to block patterns (e.g., Disallow: /?s=* for search result pages).
Combine with Noindex: Robots.txt doesn’t deindex pages—it just stops crawling. Pair it with meta noindex tags for pages you don’t want in search results.
You May Like: NexorbalOptimization
There you have it—a complete guide to adding and editing robots.txt in WordPress! Whether you’re using an SEO plugin, diving into FTP, or coding custom rules, you’ve got the tools to make your site crawler-friendly.
Just remember to plan your rules carefully, test everything, and keep an eye on Search Console for any hiccups.
Got a tricky robots.txt question or a specific use case? Drop it in the comments, and let’s geek out together! And if you found this guide helpful, share it with your SEO crew—let’s keep those WordPress sites ranking high.
Happy optimizing! 😃
