Contact Info:
+88 01601135050
[email protected]
Learn how to easily connect your DreamHost email to Gmail. Follow my step-by-step guide to seamlessly integrate your DreamHost email with your Gmail account for efficient email management.
Are you looking for the easiest way to connect DreamHost email to Gmail? If so, then you’re in the right place. Even if you’re not using DreamHost, no worries! Any cPanel users can set their webmail to Gmail by following the instructions below. It will take up to 5 minutes to connect Gmail with DreamHost email or other cPanel webmail.
Let’s say, you’re a DreamHost user and get started.
After reading this article, you’ll be able to receive and send emails from your Gmail. In this tutorial, I’m going to connect one of my DreamHost brand emails to Gmail. Okay, enough intro — let’s dive into it.
The first thing you need to do is, log in to your Gmail and DreamHost email account. After that, follow the steps below.
1. First of all, head over to Gmail and log in to your account.
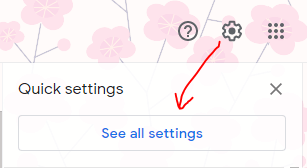
2. After login, click on the “Gear” icon > “See all settings” to visit the settings area.
3. Now click on the “Account and Import” tab.
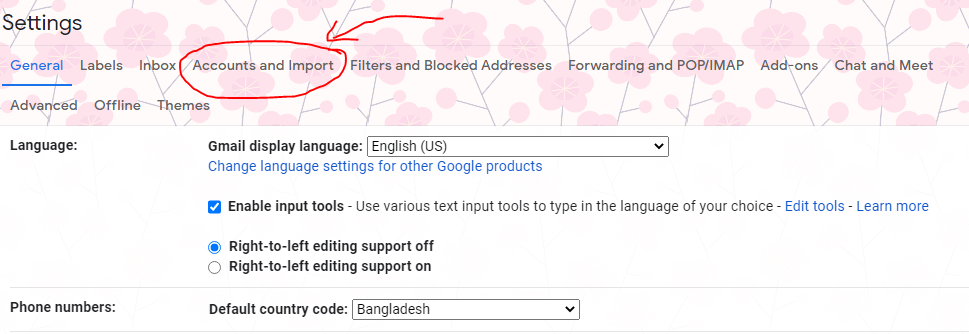
4. You’ll find the “Check mail from other accounts” option in the Account and Import tab. Now click on the “Add a mail account”.

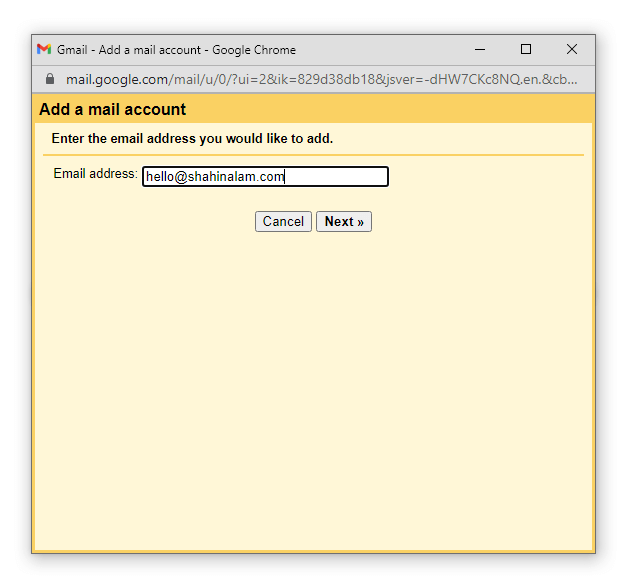
5. Now enter your full email address in the blank field and then click on the “Next” button.
6. In this step, make sure it is set as “Import emails from my other account (POP3). Now click on the “Next” button.
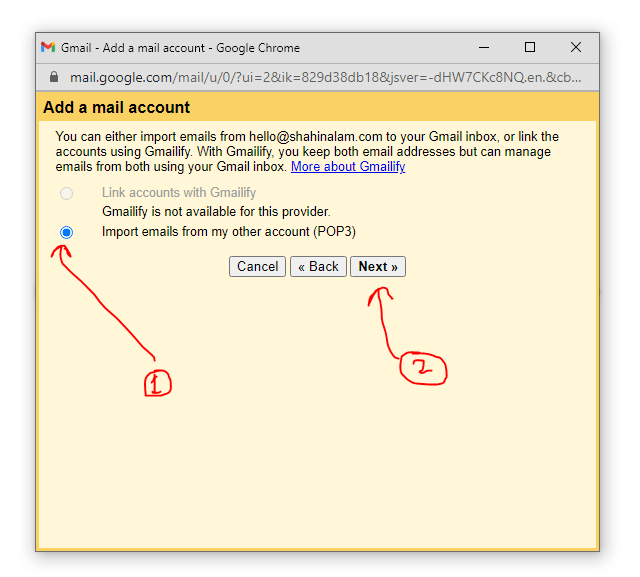
7. Now fill up the information.
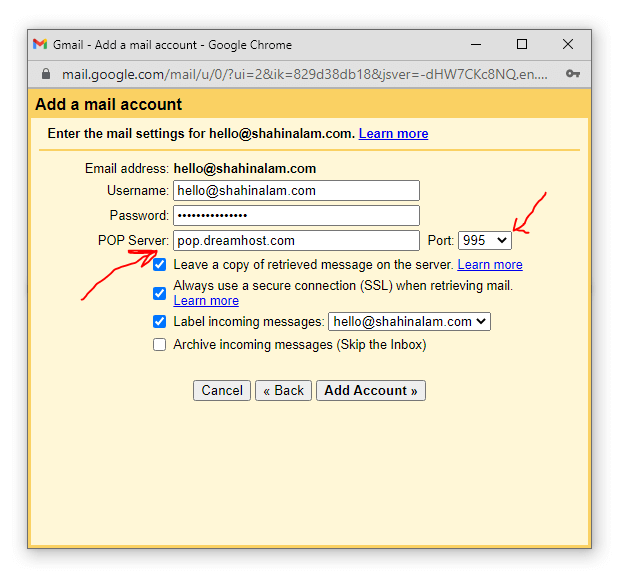
Username — Type your full DreamHost email address.
Password — Type your DreamHost email password.
POP Server — Now type this address “pop.dreamhost.com”.
Port — Set as “995”.
Check the first 3 options — Follow the image above.
Now hit the “Add account” button to finish this step.
We’ve successfully added our DreamHost email to Gmail. Now we can check DreamHost’s all emails in the Gmail inbox. Okay, let’s jump into the next step.
Last time, when you click on the “Add account” button, maybe you see a pop-up window like below.
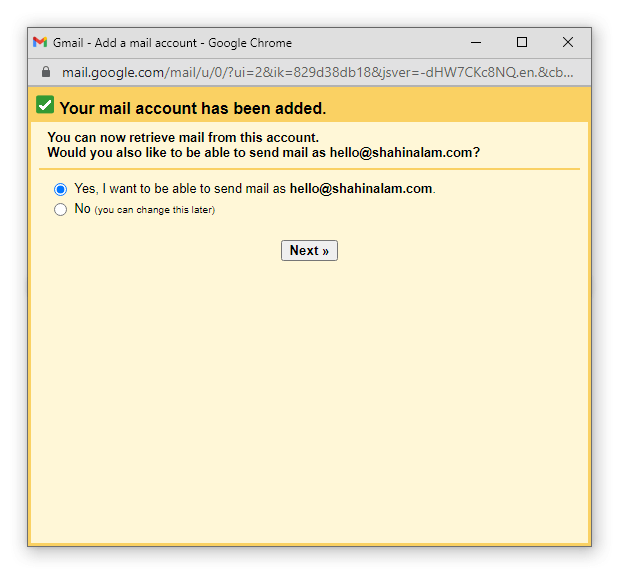
1. Now make sure it is set as “Yes, I want to able to send mail as [your DreamHost email]”. Then click on the “Next” button.
2. In this step, set your name & then click next step.
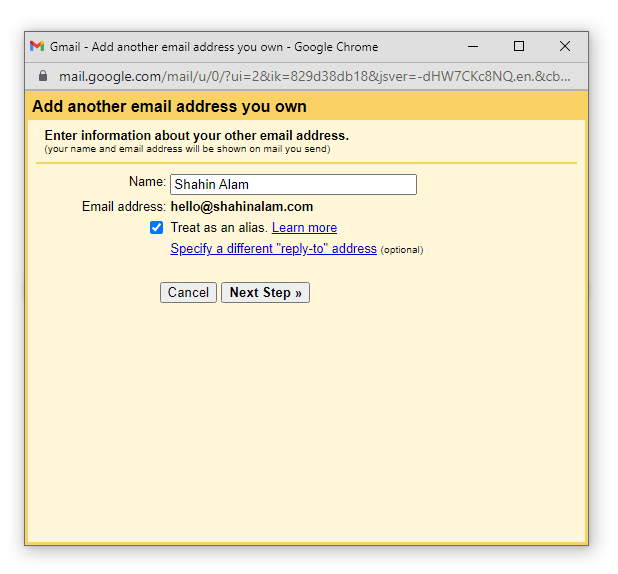
Name — Enter Your Full Name. People can see this name when you send an email.
Check the box — Treat as an alias.
Maybe you wondering… why you need to check this. Learn more here.
3. Now you need to fill up the SMTP server information like below.
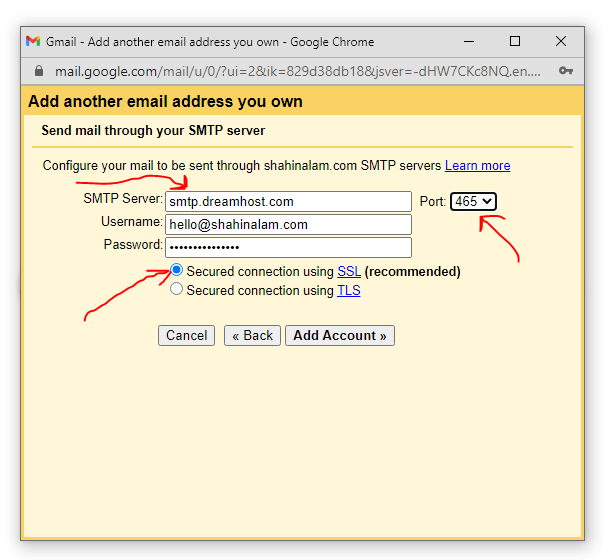
SMTP Server — Place this address “smtp.dreamhost.com” in the first field.
Port — Set the port as “465”.
Username — Enter your full email address.
Password — Enter your email password.
Check this box — “Secured connection using SSL”.
After that, click on the “Add account” button.
4. In the last step, you’ll see a verification pop-up window like below.
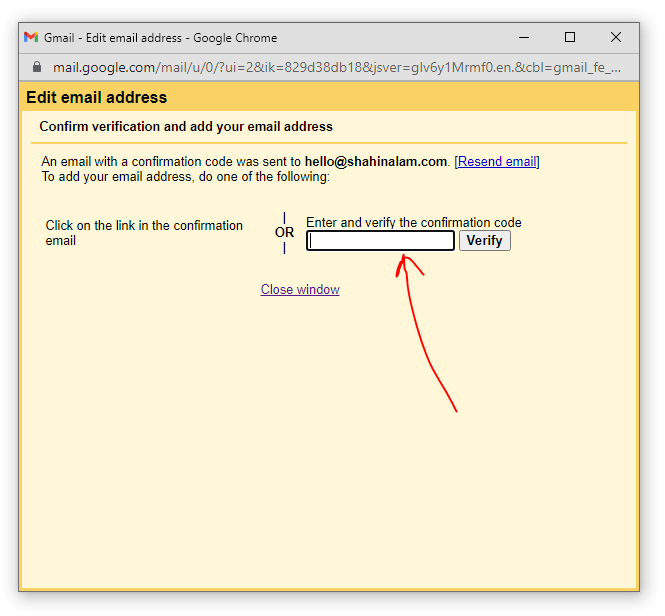
Log in to your DreamHost email and you’ll receive an email with a verification code. Now copy the verification code and paste it into this window. After that, click on the “Verify” button to complete the verification process. When you click on the verify button, this window will automatically close.

Now you can set your DreamHost email as the default email address in Gmail. To do that, just click on the “make default” option on your Gmail settings page.
And boom! You successfully connect the DreamHost email to Gmail. Now you are ready to send and receive emails from your Gmail account. Let’s check it out.
Open your Gmail account and click on the “Compose” button to send an email.
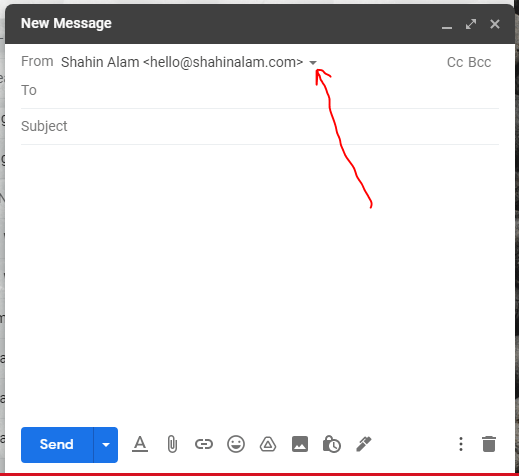
Now you can switch your current Gmail address to a DreamHost email account by clicking the dropdown icon.
Okay, you are all set!
I hope this article will help you a lot to connect DreamHost email to Gmail. If you have any problem connecting your email account, then you should contact DreamHost support. They are super friendly!
Anyway, I’d also like to help you here. So you can drop your message in the comment section below. I’ll respond to you as soon as possible. See you in the next post.
Stay home, stay safe — take care. 🙂